 Want a super-simple way to add another level of flavor and texture to your meals?
No fancy equipment required, and it can be done in a matter of minutes! You can even delegate this simple task to a teenager or spouse!
If you guessed TOASTING NUTS, you’re right!
If you are new to toasting nuts, or if you are thinking “why take the time to do this?”, we think you will be amazed at the depth of flavor and texture a few minutes on the stove or in the oven will add. Toasting nuts releases their oils and results in something called the Maillard reaction…creating incredible aromas and flavors!
Why nuts?
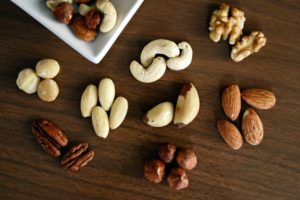 It’s a well known fact that nuts – whether raw or toasted – are super-healthy, loaded with healthy fats, protein, fiber as well as a variety of nutrients and antioxidants. Of course, it’s important to not go overboard, but a handful of nuts or a couple tablespoons of nut butter every day is a beneficial part of a REAL food diet.
In fact, Eat REAL America is loaded with recipes that include a wide variety of nuts including almonds, pecans, walnuts, hazelnuts, macadamias, pistachios and pine nuts (which are actually seeds…more on seeds later).
How do you get those amazing aromas and flavors?
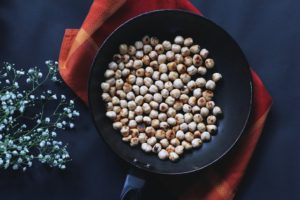 The two best ways to toast nuts are in the oven and on the stove. Some people use the microwave to toast nuts, but we prefer the oven or skillet.
The oven is best if you are toasting a large volume of nuts, and it’s also easier to toast the nuts more evenly vs. on the stove.
The stove may be a better option if you have a smaller portion or are “crunched” for time…seriously, 5 minutes tops!
Oven method:
- Pre-heat the oven to 350 degrees.
- Spread nuts in a single layer on a baking sheet (or use multiple baking sheets, depending on how many you are roasting).
- Roasting time can range from 5-20 minutes, depending on what type of nut you are roasting. Lighter, more tender nuts (such as pecans, pistachios, pine nuts and walnuts) may take less than 10 minutes, and denser nuts may take a little longer (such as almonds, hazelnuts and macadamias). Also, chopped or sliced nuts will be done faster than whole nuts (so your sliced or slivered almonds won’t take as long as whole almonds).
- Stir the nuts every 5 minutes to help them brown evenly and keep them from burning. They can go from perfect to burnt very quickly, so keep an eye on them and let the aroma be your guide.
- Once they are done, remove them from the baking sheets to cool.
Stove-top method:
- Heat a DRY pan or skillet over medium heat. No oil needed — the nuts have enough of their own oils to prevent sticking.
- Once the pan is hot, add the nuts in a single layer.
- Stir the nuts frequently and watch them closely…they will be done in as little as 3 to 5 minutes. You know they are done when they are slightly browned and fragrant.
- When done, remove from the pan or skillet from the heat so they don’t keep cooking, or transfer them to a bowl or plate.
It really is that simple!
More tips on nuts:
 Toast whole nuts, then chop. If your recipe calls for chopped nuts, you may want to first toast them whole, and then chop them once they are cool.
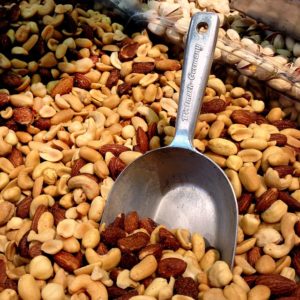
- Buy in bulk. It’s true that nuts are not cheap. Buying in bulk can be a great way to save some money. We love to buy raw nuts in bulk, and then have the option to use them raw or toast them, and even add seasonings, for a different aroma and flavor.
- Store nuts in the fridge or freezer. The oils and fats in nuts are super-healthy, but they can also turn rancid when exposed to light, heat and air. If you have room, it’s best to store your nuts in your refrigerator or freezer. They will generally stay fresh in the refrigerator for up to 6 months and in the freezer for one year or more. Toasted nuts are especially important to store in the refrigerator because the oils and fats are exposed to the air when heated. Keep any leftover toasted nuts in the fridge. Think of toasting nuts as more of an immediate use, but they should stay good in the fridge for a couple weeks.
- DIY is always better. If you buy nuts at the store, always look at the ingredient labels. Beware of added salts and sugars, as well as a variety of artificial ingredients. Also, many nuts you buy at the store have been roasted using oils. If possible, it is best to avoid nuts roasted in safflower, sunflower, cottonseed, corn, soybean or grapeseed oils. See our coaching tip, “Oils, they are not created equal” for more on this topic.
 Sweet and spicy! Adding sweet and/or spicy seasonings can add even more over-the-top flavor to your nuts! You know those delicious candied walnuts that were on your salad that you can’t stop thinking about?! You can easily make them at home! Check out the Roasted Broccoli & Corn Bowl with Candied Walnuts and the Spinach Salad with Apples & Sweet Spicy Nuts for a couple of great examples.
- Don’t forget the seeds! Everything we have discussed regarding nuts is also true for certain seeds including sesame seeds, sunflower seeds and pepitas (pumpkin seeds). Throw them in a skillet until they are fragrant and add another level of flavor to your meal.
What are the best ways to use toasted nuts and seeds?
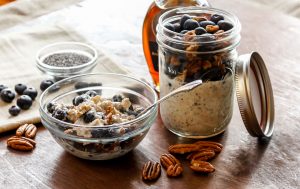
Any way you want — let your imagination run wild! You can incorporate the flavors, textures and aromas of toasted nuts into so many things! They are delicious when added to salads, baked goods, oatmeal, yogurt, pastas…we can probably find ways to incorporate toasted nuts and seeds into just about any meal. For inspiration, here are some excellent ideas to get you started:
Scrumptious Swiss Oats & Fruit
Balsamic Watermelon Chicken Salad
Cajun Chicken Salad with Grilled Peaches
Roasted Cabbage with Parmesan Walnut Crumble
Roasted Curried Carrots with Pine Nuts & Raisins
Cucumber & Tomato Salad with Green Goddess Dressing
Herbed Couscous with Raisins & Pine Nuts
Roasted Chickpea & Sweet Potato Buddha Bowl
We would love to hear from you!
What is your favorite way to enjoy toasted nuts?
 LEARN MORE ABOUT THE NAPKIN!




Leave A Comment