 Did you see our coaching tip from a couple of weeks ago?
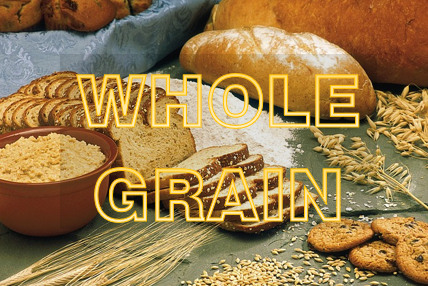
In The Whiter the Bread, the Sooner You’ll Be Dead, we tried to reassure you that you don’t need a chemistry to buy nutritious bread at the store. When buying bread, two of the most important things to focus on are looking for a WHOLE GRAIN as the first ingredient, along with a short list of recognizable ingredients.
This week, we want to give you an idea to take full control of the ingredients in your bread!
Yes, you guessed it —
 You can make your own nutritious and delicious bread right in your very own kitchen…and you don’t need fancy equipment to do it!
As you know, we are huge believers in making things ourselves whenever possible. Just a few examples include salad dressings, pesto, pizza crust, seasonings, enchilada sauce, pickled veggies and so much more. And bread is another great one to add to the DIY list. Plus, it meets the Eat REAL America requirements of being easy-to-prepare, good for you, delicious, REAL ingredients and affordable ($1.00 for an entire loaf, plus the cost of your add-ins)!
The bread we want to introduce you to (if you have not already met) is…
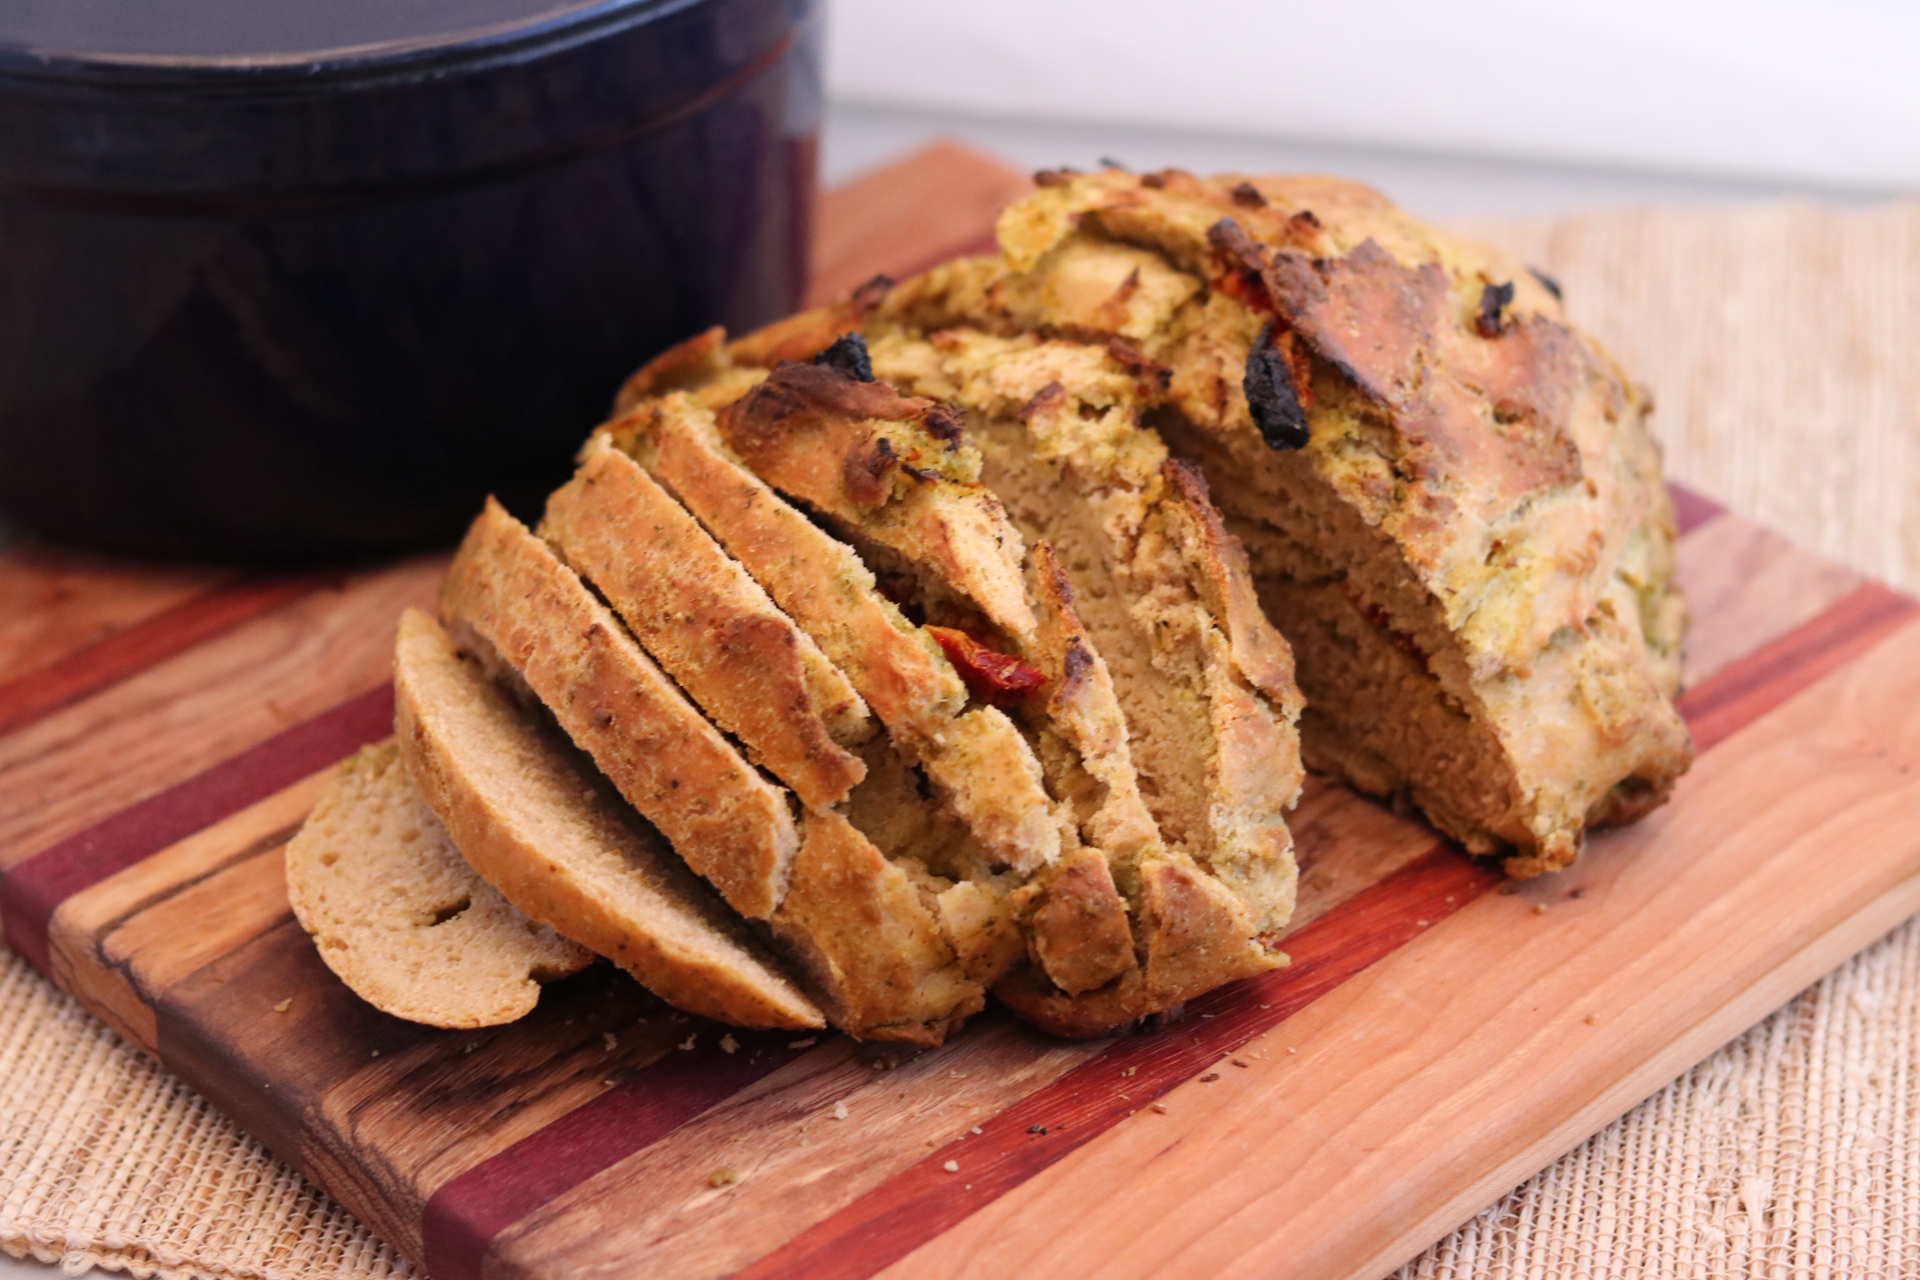
Dutch Oven Bread.
All that is required is a Dutch oven and a few simple ingredients (whole wheat flour, water, yeast, salt and your “add-ins”)!
Why a Dutch Oven?
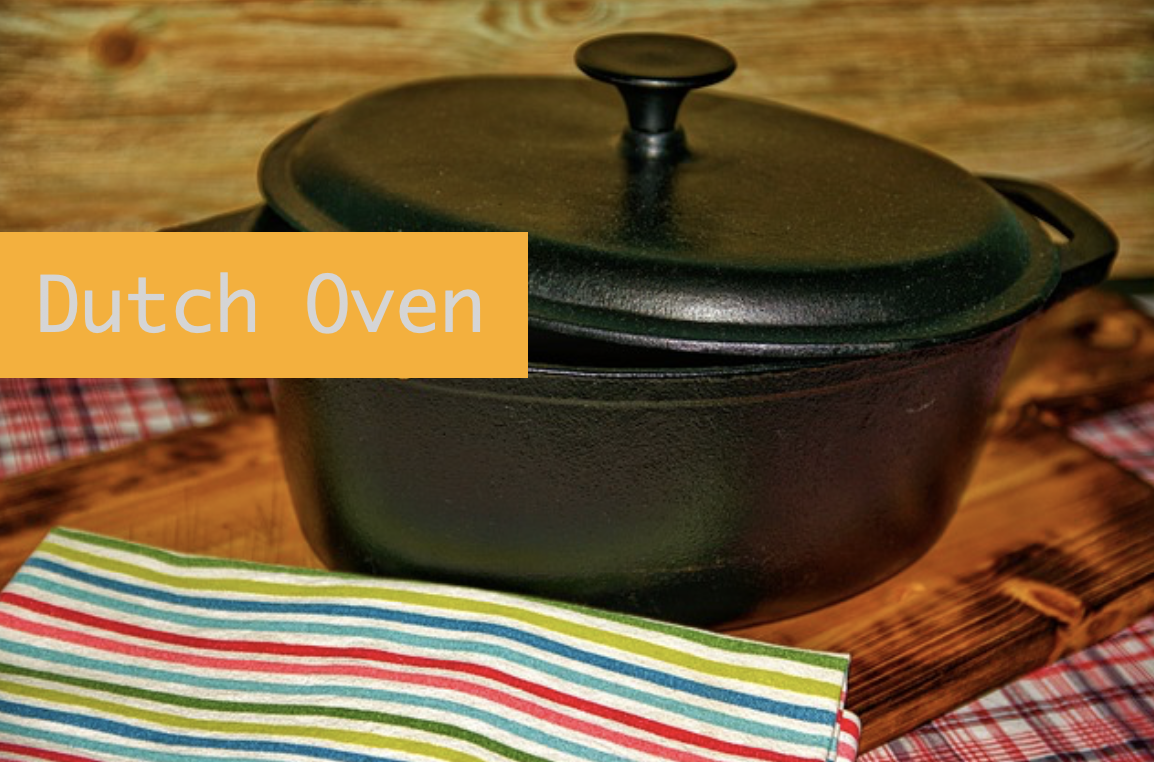 A Dutch oven is a thick-walled cooking pot with a tight fitting lid. Most Dutch ovens are made of seasoned cast iron; however, some are made of cast aluminum or ceramic. Enameled cast iron Dutch ovens are a great option because they are easy to clean and don’t require special seasoning and cleaning.
These pots are like little compact ovens and are oven safe to 500 degrees, including the lid! They are great for bread because they distribute heat all around (even generating steam from within), allowing it to bake evenly.
How do you do it?
Brace yourself…the process is incredibly simple! There are only 4 simple ingredients: whole wheat flour, water, active dry yeast and salt — that’s it!
- MIX THE DRY: add 1 tsp of yeast with 1 tsp of salt and 3 cups of flour to a large bowl. Stir to combine.
- ADD WATER: pour 1 3/4 of slightly lukewarm water into the bowl and stir to combine. Form it into a big ball (kneading is optional) — the dough should be sticky.
- COVER AND LET RISE: cover the bowl with plastic wrap or a towel and let sit at room temperature overnight (for 8-10 hours).
- It’s a set-it-and-forget-it kind of recipe!
When you are ready to bake the bread:
- PREPARE THE POT: first, grease and flour the Dutch oven (with 1-2 tsp of oil and 1-2 tsp of flour). An oil like avocado oil or coconut oil is a good idea since you are cooking at a high temperature.
- PREHEAT: turn the oven to 450 degrees and place the Dutch oven in the oven while it preheats.
- FORM DOUGH INTO A BALL: flour your hands and remove the dough from the bowl (it will have risen and will still be sticky). If adding other ingredients, add them now and use your hands to form it into one large ball, distributing the ingredients throughout the dough. (Mixing the flavor ingredients doesn’t have to be perfect — just mix them in and you are good to go!)
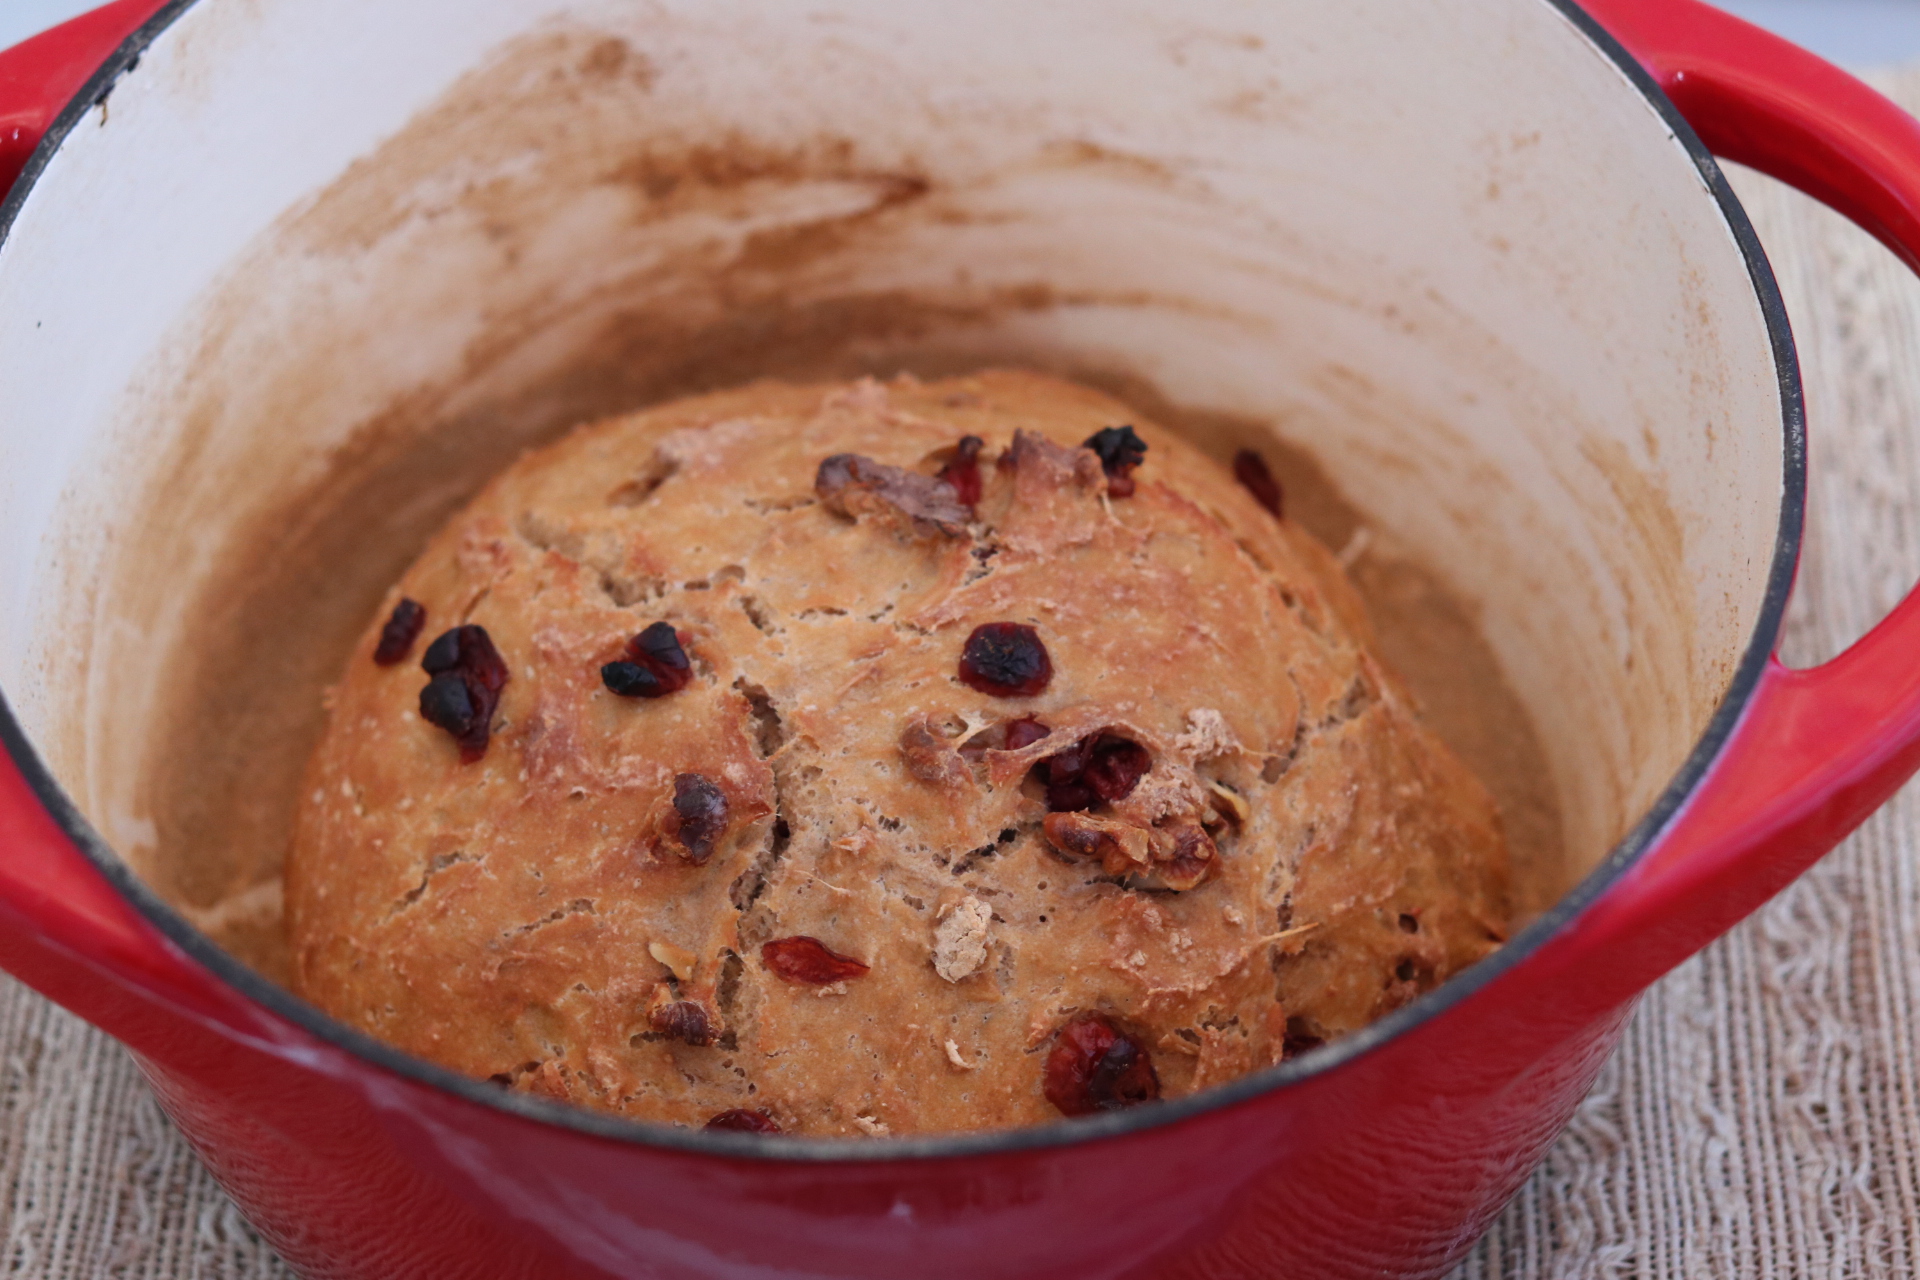
 BAKE COVERED: when the oven is ready, remove the hot Dutch oven from the oven (this is where hot pads come in VERY handy), and drop the ball of dough into the center of the pot. Cover and bake the bread for 25 minutes.
- BAKE UNCOVERED: after it has baked covered for 25 minutes, remove the lid of the Dutch oven and bake for another 20 minutes.
- COOL, SLICE and ENJOY! When the bread is done, carefully remove the loaf from the Dutch oven and let your bread cool before slicing. You can store the bread on the counter at room temperature or in the refrigerator for 3-5 days, or freeze for 3 months.
Now, pat yourself on the back — you have successfully baked a crusty, rustic delicious homemade bread that is worthy of being passed down to future generations!
A few tips for success!
The Dutch Oven:
- A cast iron Dutch oven distributes heat a little more evenly, but any type (cast aluminum or ceramic) will work well.
- Dutch ovens with solid lids (vs glass lids), will give maximum heat retention.
- Typically, the best size to use is 5-7 quarts. We used our largest Dutch oven which is 6.5 quarts with great success!
- And, most Dutch ovens are dishwasher safe, but it is recommended that you hand wash them, similar to how you would clean a cast iron skillet.
The Flour:
 As you can imagine, we like our bread to be 100% whole wheat, and we successfully used white whole wheat flour for this recipe. White whole wheat flour is lighter and fluffier than regular whole wheat flour and is nutritionally just as beneficial — see our flours coaching tip for more info! Keep in mind, whole wheat pastry flour is not recommended for recipes using yeast.
Something to keep in mind…whole wheat flour (and white whole wheat flour) will provide a denser and chewier texture. To make your bread lighter and less dense, you can either:
- Add Vital Wheat Gluten (add 1 Tbsp for every 2-3 cups of flour). Vital Wheat Gluten improves the elasticity and rise of the raw dough, and tends to produce a lighter texture. It can be found in the baking section at the store, and you can add Vital Wheat Gluten to any bread recipe.
- OR, your bread obviously will not be 100% whole wheat, but another option is to substitute white all-purpose flour for some of the whole wheat flour. You can substitute the white all-purpose flour one-to-one.
The Yeast:
 Because this is a slow-rising recipe, you want to use active dry yeast.
And, since yeast is a living organism and will lose its effectiveness over time (even if it is not opened), you will want to check the expiration of the yeast. Because of this, it can be beneficial to buy smaller packages of yeast and check the “best if used by” date.
Now for the fun part — fantastic flavor combinations!
The beauty of making homemade bread is it can include whatever flavor combination you can dream up! Here are a few ideas to start with, and then please share with us your creative masterpieces!
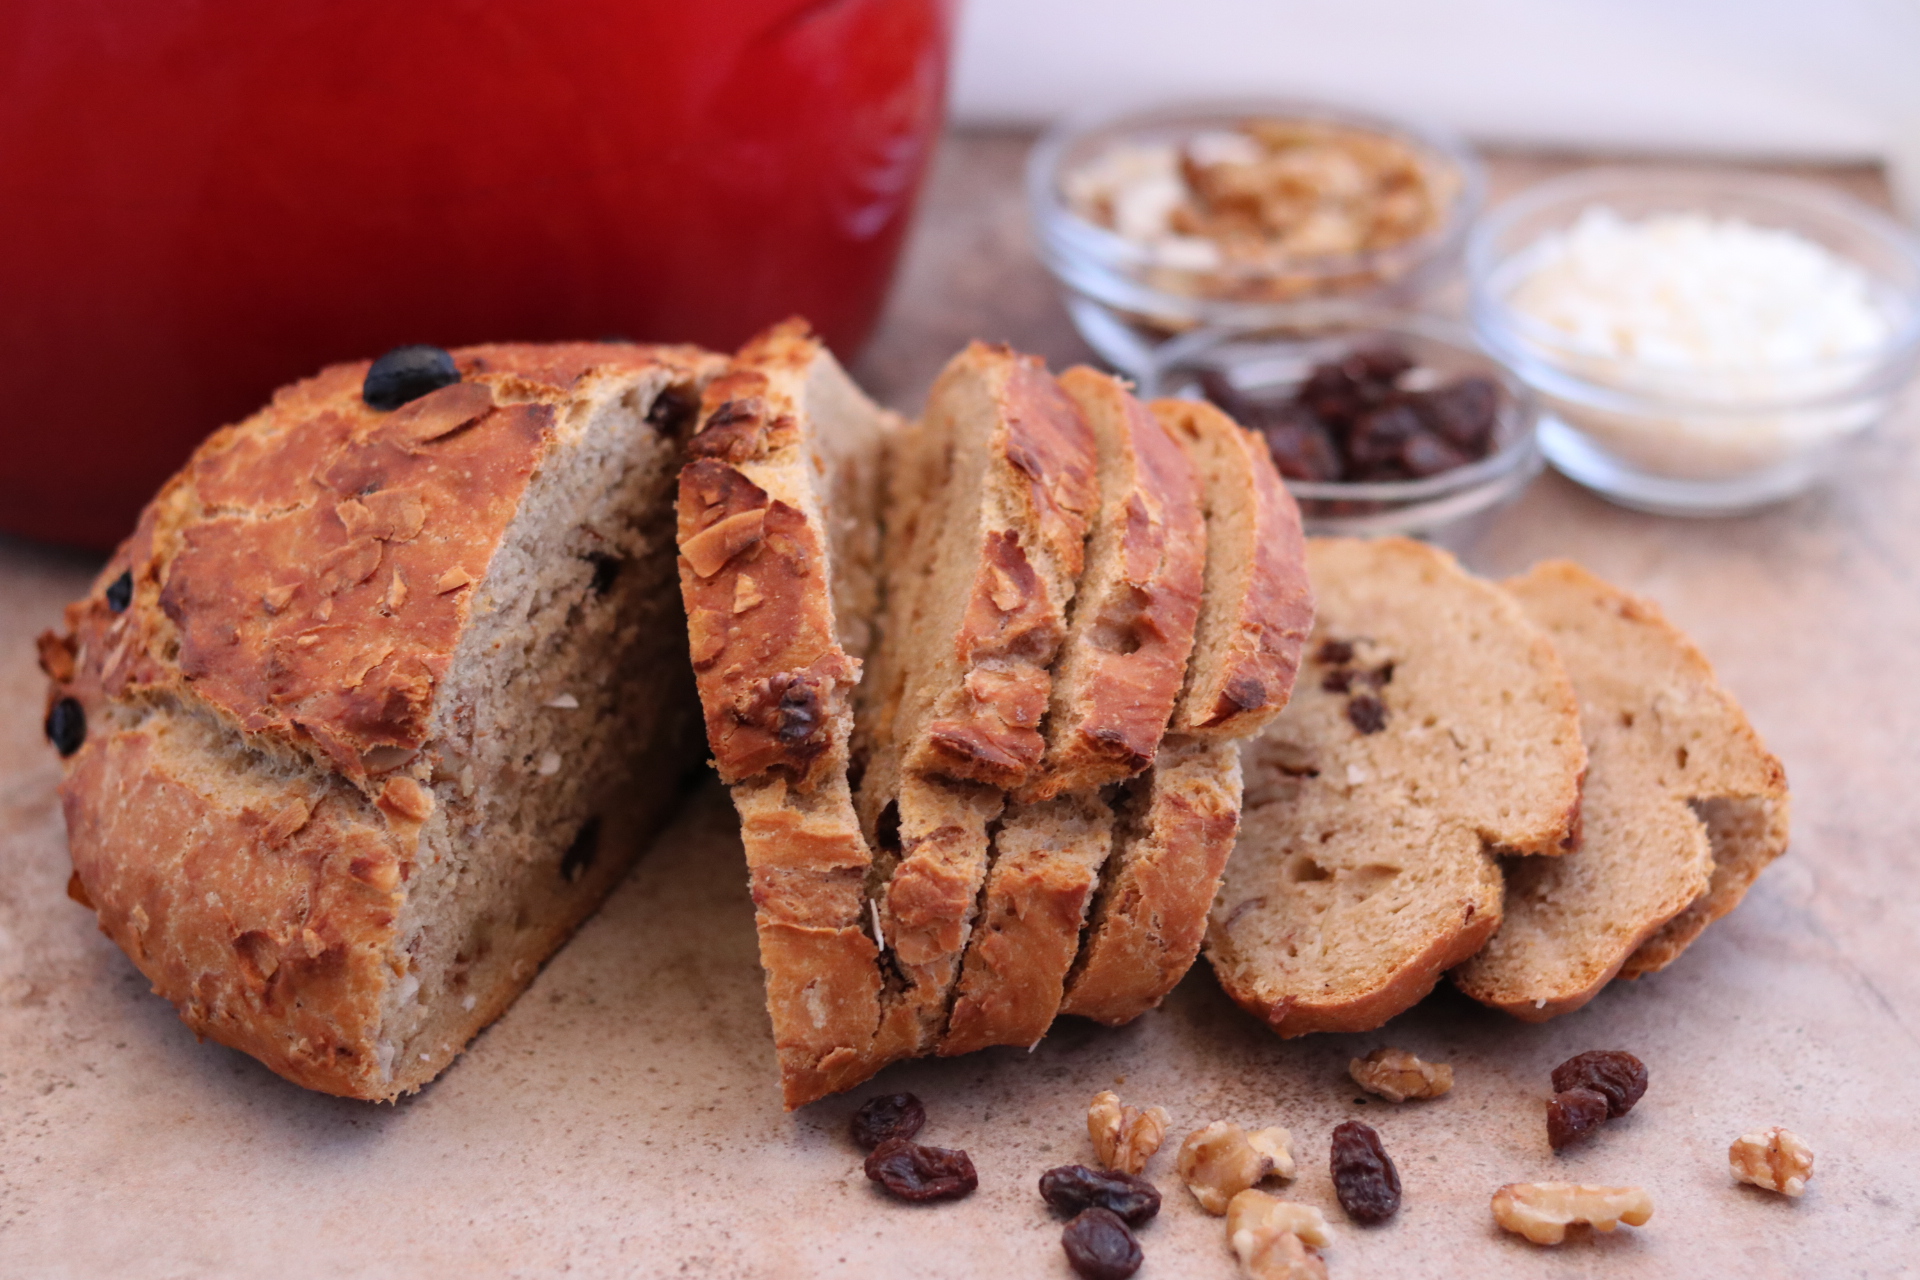
- Cranberry Walnut – add 1/3 cup of chopped walnuts and 1/3 cup of dried cranberries to the dough before baking.
- Pesto and Sun-Dried Tomato – add 1/4 cup of pesto and 1/3 cup of sun-dried tomatoes to the dough before baking. (Tucking the sun-dried tomatoes into the dough before baking will keep them from browning too much.)
- Muesli – add 2-3 Tbsp of each of these: coconut flakes, pumpkin seeds, raisins, and chopped or sliced almonds. And, you can add 1/2 tsp (or more!) of cinnamon and/or nutmeg.
Zonya Says:
Wait a minute! Isn’t bread fattening?
The secret to enjoying bread is not letting it elbow out your ample (or 7-11) servings of veggies and fruit in a day. Even post-menopausal women can enjoy up to 3 whole-grain servings in one day. So, why not spend some on homemade whole-grain bread? REAL food is REAL living!
Give it a try to let us know your thoughts!
And, don’t give up if your first loaf doesn’t come out perfect! Keep in mind, there are many variables that can affect the outcome, including water temperature, room temperature, yeast, flour and even the elevation and air.
What is your experience? As always, we love to hear your feedback and what works for you!
Leave A Comment