 What really is the difference between chopped, diced, and minced?
And, how much is a “dash?”
Where is the cooking terminology instruction manual?!
 Some “fancy” cooking terms can sound intimidating, maybe even scaring you away from great (and easy) recipes that call for the food to be “braised” or for the sauce to be “reduced.” We were fortunate to grow up around a mom and grandmother who both cooked frequently, but as we started to cook more on our own, some cooking terms still sounded confusing and intimidating!
Although we have come a long way and these cooking methods have become almost second-nature now, we wish we would have understood more about them sooner…we are pretty sure we’ve missed out on some fantastic meals!
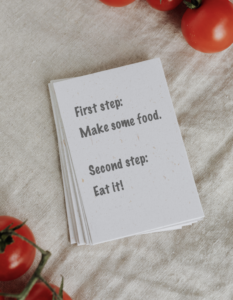
Since cooking can be a little more complex than just Step 1: Cook the food. Step 2: Eat the food…here is a list of some cooking terms and what they mean. Hopefully it will remove some of the mystery and increase your confidence to tackle all those great REAL food recipes!
Chop: chopped usually means to cut your vegetables into large square size pieces. Basically, this means 1/2 to 3/4-inch pieces, and some recipes may tell you exactly how big to make them. A good frame of reference for chopping is also “bite size pieces.”
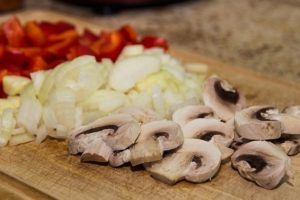 Dice: diced is small chops, which means around a 1/4 to 1/8-inch pieces of food. Sometimes a recipe will give specific instructions like “dice into 1/8-inch squares.”
Mince: when a recipe calls for something to be minced, it means to cut it in the smallest size pieces you can with a knife. You will see mincing with various recipes and most commonly, garlic. (This is where we think a garlic press is a handy and easy way to “mince” garlic).
Slice: sliced is exactly what it sounds like. For slices, just cut vertically down on your vegetables or whatever you are slicing. Typically you can slice these as thick or thin as you prefer, and sometimes recipes will tell you how thick or thin to slice something. To get some practice, try slicing the beets and red onion in the Roasted Beets with Walnuts & Gorgonzola!
Julienne: to cut fresh vegetables or other foods into thin matchstick-size pieces, typically the same length. The Raw Pad Thai is a great meal to perfect your julienne skills!
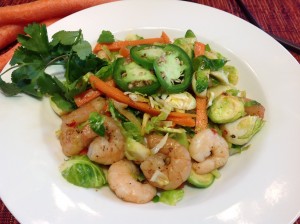 Sauté: sautéing means cooking small pieces of food over a medium-high heat with a small amount of oil in the pan. It is a good idea to move the food around with a wooden spoon or spatula as you cook it. The goal is to brown the food slightly without burning it. Give the Shrimp and Brussels Sprouts Stir-Fry a try!
Pan fry: pan frying is when you cook larger pieces of food like chicken breasts or steak over a medium to medium-high heat. Pan frying often uses more oil than sautéing (up to 1/4 inch in the pan). You typically want to leave the food undisturbed when pan frying, except for occasionally flipping it to allow it to cook on both sides. You could use this method with something like the Open-Faced Catfish Sandwiches, although we think these cook fine with 1 Tbsp of oil.
Sear: to sear something, you want to use very high heat to brown the surface without cooking all the way through. The pan should be hot before you add the food. A cast iron skillet works great for searing. Just enough oil should be added to coat the bottom of the pan (canola or coconut oil are best, since they can stand up to the high temperature).
Braise: braising is simply a cooking method where meat or vegetables are first browned in butter and/or oil, then cooked on low heat (typically in a covered pot) with a small amount of cooking liquid for a long period of time. This slow cooking process tenderizes the food by breaking it down, which also brings out the flavor. Try the Braised Red Cabbage with Apples or the One-Pot Braised Chicken with Tomatoes!
Simmer: to simmer something, you want to bring it to a boil and then reduce the heat so you don’t see bubbles (or it is just barely bubbling). Usually around 200 degrees, simmering is meant to heat food and bring flavors together without the harshness of boiling. This flavorful Sunday Sauce is super-easy and delicious and simmering breaks down the tomatoes and brings all the flavors together!
Reduce: reducing a liquid simply means to simmer or boil it to evaporate some of the liquid (reducing the amount). This concentrates the flavor and/or thickens the mixture. Perfect this skill making the Balsamic Shredded Brussels Sprouts or the Caramelized Onion, Apple & Prosciutto Pizza!
Deglaze: this is often done to create a sauce with the little bits of meat or vegetables leftover in a pan after pan frying or sautéing. You add a small amount of liquid (often stock or broth, wine, beer or juice), use a spoon or spatula to loosen the “bits,” allow it to simmer or boil, and then proceed with the recipe instructions. Give the Tuscan Chicken a try!
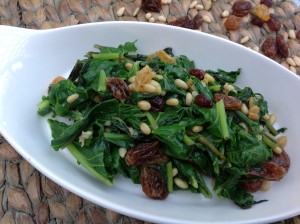 Blanch: to cook food briefly in boiling water, and then plunge it into ice water. Plunging it into the ice water is called “shocking” the food, and it also stops the cooking process. Blanching tenderizes the food or mellows out its flavor and can bring out the bright color of vegetables! Try the Swiss Chard with Raisins & Pine Nuts or the Green Beans with Charred Onions!
Bake: as we all probably know, baking is about surrounding your food with a consistent temperature which cooks it from all sides. So, when you’re baking something, the entire oven reaches a certain temperature and cooks your food as a whole. Of course, the Baked Oatmeal Cups are always a fantastic option!
Roast: roasting and baking are both dry heat cooking methods. Often, the term roasting is used when cooking meats and vegetables whereas baking is used for cakes and cookies. Roasting also uses higher heat (400 degrees and higher) to create the caramelization and flavorful “crust.” Believe it or not, you can even roast fruits – try the Roasted Grape, Goat Cheese & Honey Sweet Potatoes!
Broil: often reaching about 550 degrees, broiling exposes your food to direct heat similar to a grill. Broiling is best when you’re trying to cook something thin or quickly melt something, such as cooking steaks or melting cheese. Check out the Zucchini Sticks with Yogurt Dill Sauce!
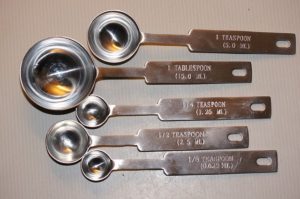
Pinch: 1/16 tsp
Smidgen: 1/32 tsp
Salt to taste: 3 finger pinch of salt
Zest: this is the finely grated skin of a citrus fruit (which contains some very flavorful oils). When asked to add zest, you want to just zest the skin, and be careful not to include the bitter white pith just underneath the surface of the skin. You can use a grater, vegetable peeler, or zester (a special tool used just to make zest). See our coaching tip – Are You Throwing Away Flavor? – for more information! Orange zest adds wonderful flavor to the Dark Chocolate Bark with Pomegranates & Orange Zest!
Is there a cooking term you find intimidating? Please share with us!
Happy Cooking!
 LEARN MORE ABOUT THE NAPKIN!
Leave A Comment